Video Transcription
hey guys welcome back to Montavue today
i'm going to be going over registration
and giving you guys a couple of demos on
how to properly register a camera from
the network onto your montague nvr
now keep in mind registration is only
necessary if you are unable to plug in a
camera to the back of the nvr
such as a poe switch or something
similar on a local network
as long as you guys are plugging the
cameras directly into the back of the
nvr
don't worry about registering them our
systems are plug and play so as long as
you're plugging them in properly the
images will pop up on their own this
only applies for cameras that are
located elsewhere on the network besides
the nvr
so to get started what we're going to
want to do is we're going to want to
obviously plug in the proper components
to make sure that you guys can search
your local network and see those cameras
properly
so to do this we want to make sure that
not only are the cameras that are in the
back of the nvr
already plugged in and ready to go
we also want to make sure our network
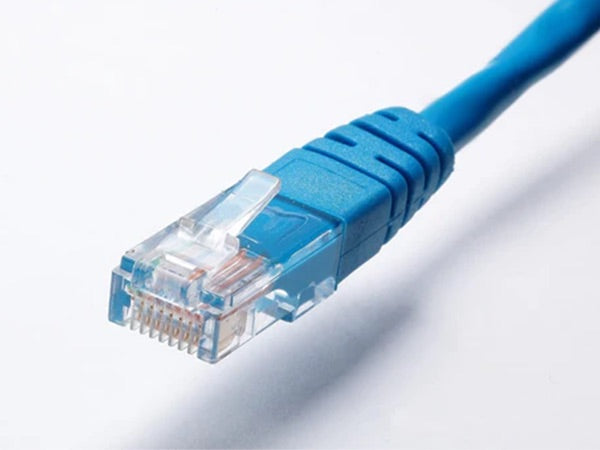
cable is properly connected
to the network port on the back of the
nvr
and then of course the other end should
be plugged into the network port of your
poe switch
you could also plug it into your router
just keep in mind that if you do use
your router as the medium point between
multiple sources of ip cams
it may slow down the signal simply
because it has to run through your
router first which can impact some of
your guys's internet speeds for other
devices so just keep in mind it's always
better to go from nvr to switch than to
router but if your guys's situation just
doesn't let that happen you can go nvr
router to switch
just make sure you're using the proper
network ports on each of those devices
and you guys should be good to go all
right so once we have all of the proper
network cables plugged in and we see the
green and orange lights on the back of
the nvr that is the best indicator that
you have everything correct
basically means that the green is
displaying a power signal and then the
blinking orange is a data signal so as
long as both of these are running you
likely have an active connection either
to your switch or to your router i want
to briefly explain why it is so
important to add an nvr cameras prior to
adding the network cameras
this is because when you add a camera on
your nvr let's just say to port 3 it
will automatically be assigned to
channel 3.
port 6 will be channel 6 so on so forth
so if i were to bring in my network
cameras first they're going to occupy
the first chronologically available
channels in the system which in this
case since i haven't added nvr cameras
is going to be 1 through 16.
so when i add my cameras from the
network and they're occupying 1 through
16 then i go to add in my cameras
directly to the nvr let's just say port
3. because channel 3 is already occupied
by a network camera that signal has
nowhere to go so therefore it's either
going to do something funny like
replicate a channel onto another channel
which is obviously what we don't want or
it's just going to simply deny the
channel from existing on port 3. either
way you're going to run into a bunch of
problems here so you guys want to make
sure that you're adding your nvr cameras
first make sure you can see them on the
channel and that they are available to
see
and then you're going to want to move
into the network registration and add
those cameras in second okay once we
have all the nvr cameras up and running
on the nvr and we have the network cable
plugged in from the nvr to the poe
switch
finally we want to add all of our
cameras to the poe switch
so we can go ahead and plug those in
right now now here we want to make sure
that we're seeing the indicator lights
on the poe switch
and there's going to be two for each
channel
one will indicate that it is getting
power and then one light will indicate
that it's actually getting a signal so
you want both of these lights to be
active to make sure that your ip camera
is going to be working just fine
so now once we have all the cameras on
the switch and then we can see the
cameras on the nvr
we can head over to the nvr interface to
get there we're going to be on the live
view we're going to right click and
choose main menu
then we're going to head over to camera
in the lower left corner
and then we're going to see
camera list or camera registration all
right guys you might notice i am on
what's called camera list but yours is
going to say registration i want a
little bit of advanced firmware that
we're going to be releasing here in a
little bit uh but i just wanted to show
you guys both versions so that you're
understanding what's going on now that
we're on the registration page i can
give you guys a quick breakdown of what
we're seeing on the bottom half it's
going to show you any cameras that are
already added to the nvr whether they
are plugged in to the nvr directly or
coming in through the network
as you can see all my cameras that are
directly plugged into the nvr are going
to show the port number that they belong
to port 1 through 16
and then they're also going to have a
couple of bits of information about the
cameras themselves you'll notice that
the ip address is always 10.1.1
this is a huge indicator that that
camera in particular is plugged directly
into the nvr
to reveal the cameras on the network
we're going to go to device search up
top then on the upper portion of this
screen it's going to show us all of the
cameras that are on the network
and as you'll notice that the ip address
is slightly different usually we're
going to get 192.168. however it could
be different on your network it's
important to note that any camera
directly plugged into the nvr will
always have a 10.1.1 address under the
subnet of the nvr
and a camera coming in from the network
will have a slightly different ip
address
also the camera coming in from the
network will have the port number of
three seven seven seven seven
both of these are great indicators to
discern which cameras are coming from
where
because oftentimes this can get
confusing for people all right so the
next step after we do a device search is
we need to identify which of these
devices are cameras and which are
cameras that we want to add keep in mind
that other devices may show up on this
device search this includes poe switches
and other nvrs if you do have them on
your network
so to identify this scroll to the right
and we can look at device type and we
want to look for ip camera or it might
have the model number of the camera as
you see here the iptz okay so once we've
identified which cameras we want to add
then you're going to see either a green
check mark or a red x
if this is a brand new camera freshly
plugged into the switch you're going to
see a red x because that camera has not
been initialized initializing a camera
is basically giving it a username and a
password so that it can sync up with
your system and your nvr
so to initialize we want to select the
check box to the left
and then we want to press initialize you
can do this one by one or you can select
any camera with a red x
again keep in mind that you only want to
select actual cameras do not initialize
your poe switch or any other nvrs if
they're showing up with a red x
so here once we're initializing it's
going to give us an option of dhcp or a
static ip address
dhcp is essentially a dynamic ip address
that will change with the system over
time
a static ip address is a set ip address
that the camera will have regardless of
what it's plugged into
there are benefits and cons to both here
at monavie we definitely recommend
setting them at static this is because
dhcp will change your camera's ip
addresses over time this will result in
de-synced cameras and a loss of
recording and your
images okay so once your cameras are
initialized we're going to do another
device search and then we're going to
see they're going to come up again only
with a green check mark this time
so now the final step is to identify
those cameras
put a check in the box on the left side
and then we're going to press add or add
device
once we do this it is going to add the
cameras in the next chronologically
available channels and then we're going
to see them appear in the bottom half of
the registration
now if everything goes right this little
dot on the status should go from red to
green
and then you should see a live image
within that channel
if everything's gone good so far and you
guys are seeing this green dot and you
guys can see an image on your screen
that you are good to go and your camera
has officially been added to your nvr
successfully now the cameras are added
you guys can go into the encode menu or
the image settings and adjust them how
you guys need them to
and then you can also see them on your
applications okay guys that is all i've
got for the registration process so if
you have run into any obstacles or if
you've hit just some snags and adding
your cameras or if you're not able to
see them there are a lot of things that
can go wrong with this process it isn't
the easiest thing in the world so if you
guys are getting any problems just give
our tech support a call the guys are
here monday through friday to give you
any assistance with this or of course
any other issues you might be having
with your nvr system
as always we really appreciate you guys
checking this out don't forget to like
and subscribe down below and you guys
have a good rest of your day thank you
for choosing Montavue

